A couple things I learned about making pasta in this attachment....you should use the base recipe provided with the machine for best results. There are tons of pasta recipes out there, but many problems people experience with their machines (too dry or sticking dough) have to do with the recipe. The recipe provided by Kitchen Aid has been tested and works perfect. I was able to make pasta on the first try by using that recipe. The second thing is......it is addicting!! This is like playing with adult play-dough. Sometimes I have so much fun rolling it that I accidentally roll it too thin because it is so fun watching it get longer and longer. My family prefers the thicker fettuccine attachment, and we like a 4 for a thick noodle or a 5 for a bit thinner. I have rolled it to a 6 before, and it is just too thin for us. I feel like they are little whisps of noodles. I have also made ravioli in the maker (maybe another post in the future), and I still like to roll it to a 5 because we like a doughier pasta bite.
Without further delay, here is the best recipe for a semolina pasta in the Kitchen Aid. I have made the semolina recipe from the booklet, and it was a little bit too tough. This recipe takes the traditional pasta recipe and mixes in 1 cup of semolina flour for 1 cup of the regular.
Recipe
4 large eggs plus 1 egg yolk
2 tbs water
2 1/2 cups regular flour
1 cup semolina flour
1/2 tsp salt (I use kosher salt)
The ingredients I use are mostly from the local market here in Okinawa, so I do not have any name brands to give, but the flour I used is the King Arthur brand. I'll include a picture.

First you want to sift your flour into your mixing bowl, then add the salt and eggs. I add my water 1tbsp at a time as I am mixing. If it seems to be wet enough with 1tbs, then I omit the second. Turn the mixer to stir, and mix until incorporated with the paddle attachment for about 30 seconds. Next, switch to the dough hook and turn to speed 2 and knead for two minutes. The dough will still be crumbly. I have never had my pasta dough actually turn into a ball on the dough hook. I imagine this is because the dough has to be a bit dryer for the pasta roller than it would be for hand rolling.
Back to the topic....so you turn the dough out onto a surface to hand knead until the dough forms a nice ball. Kitchen Aid says to do this for about 1-2 minutes, but I think it takes me at least 5. Then I wrap the dough in plastic saran wrap and let sit for about 20-30 minutes. Once it is done resting divide it into pieces to feed into the machine. You will press it down flat a bit with your palms, then run it through the machine on 1 to start. I fold it over a couple times and repeat the process. Once the sheet is a nice even-ish size, I move on to level 2. I run it through 2 about 2-4 times. Then I switch to 3 and roll it through twice. I roll the rest of the numbers twice too, stopping at the number thickness I like my pasta (4 or 5). Then you will switch out the rollers to the cutter roller. Then you just turn the machine to speed 2 and roll the sheet through. I only let my flat sheets set for the amount of time it takes me to roll them all out flat and that seems to work just fine. I didn't mention dusting my sheets with flour because I usually do not have to. I dust the work space once before I roll it into a ball, but that is it. If, for some reason, your dough is too wet, you can dust it with flour. You do not want your dough getting stuck into your rollers. If I do not want to make all the dough at once, I keep the ball wrapped in plastic in the fridge and use more the next day. It really can only keep like 2 days, and even then I check to see what it looks like. You can always roll and cut it all and keep it frozen or in the fridge too. I have done it both ways. I do not have a pasta drying rack yet, so I like to just roll and cut in small batches for now. Here are some pictures to better illustrate the steps.

This is how I sift my flour now. It is much easier than the sifting machines. I have broken like 3 of those, and this has lasted me a long time. It is a simple strainer looking thing that I got for 100 yen.


The "crumbles" after I have kneaded with the dough hook

Dump those crumbles onto a surface to hand knead into a nice ball

Hello nice ball wrapped in saran wrap

This is what it looks like when it goes the first few passes on the #1 roller setting

Then I take and fold it over on itself and run it through the machine again until it is a nice square/rectangle that fills the machine width nicely
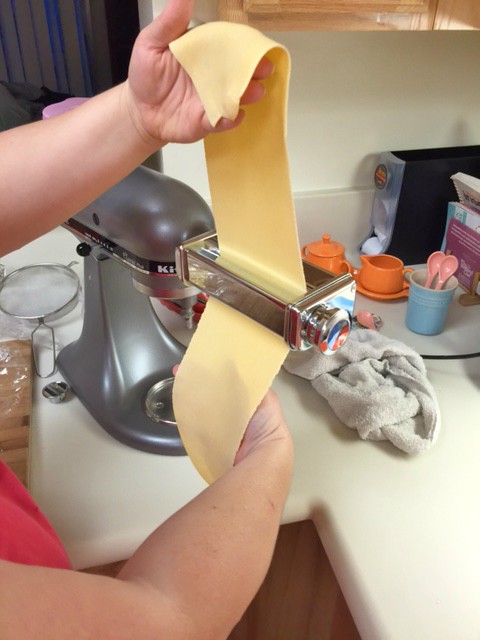
Rolling the sheet through


Running it through the cutter


The final product.....yum yum!
No comments:
Post a Comment